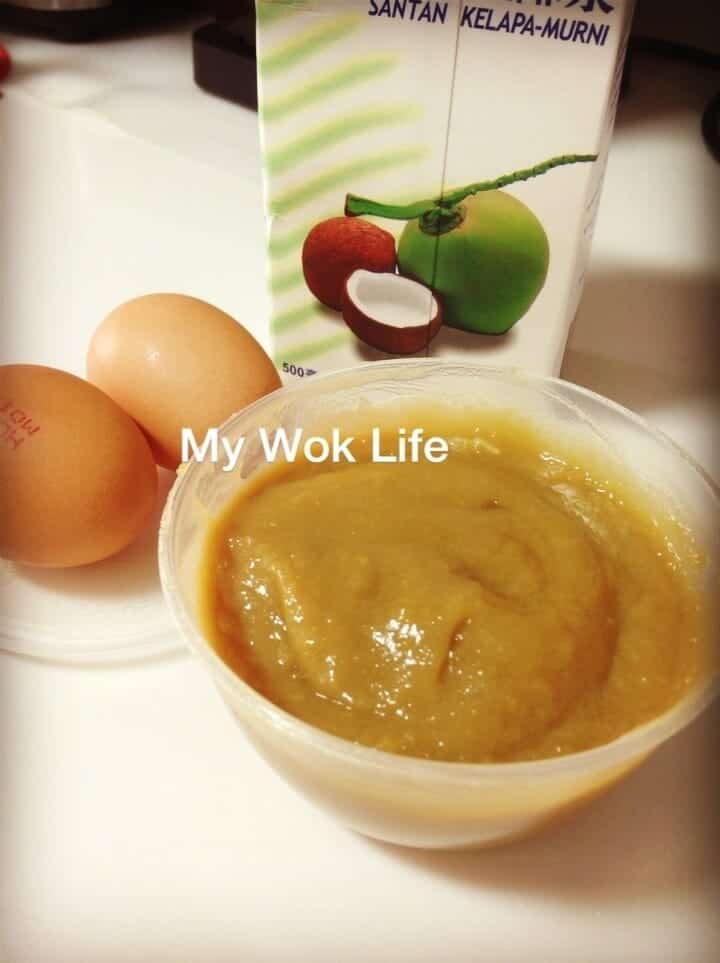
 “Quick-cooking aromatic Kaya jam ready in less than 30 minutes.”
For those who aren’t staying in Singapore, Malaysia or nearby countries, you might not know what is Kaya jam. Kaya, is a sweet & creamy coconut spread made from coconut milk, eggs and sweetened with sugar. It is usually served on toast with butter slice as a great breakfast or tea time snack. It is also great as filling in bao (steamed bun) and cakes. Some Kaya will be flavored with Pandan juice or essence, but I still preferred the traditional brown color type, with just a hint of Pandan flavor instead of making it the strong flavor and in green. It’s just personal personal choice with no special reason.
Actually, I wasn’t really keen to make Kaya as we don’t usually eat this at home. Fresh homemade Kaya jam is best to consume within 5-7 days, and a most of the time, we couldn’t. So, I would only make Kaya, unless I have the right amount of yolks leftover unused. Yes, that’s the reason I made this Kaya yesterday. I left some yolks from making the flourless Nutella cake the other day! See, these recipes now come hand in hand (chuckles).
Anyway, making your own Kaya jam at home is good as you won’t get to eat the preservative in it. Not only that, the addition of Muscovado, or called it Molasses sugar, in my recipe benefits your health even. Hence, I reckon using Muscovado (unrefined dark brown sugar). Of course, you may also switch to coconut palm sugar or brown sugar.
In my recipe, I also added only the yolks instead of whole eggs as I personally think that it tastes stronger and more aromatic.
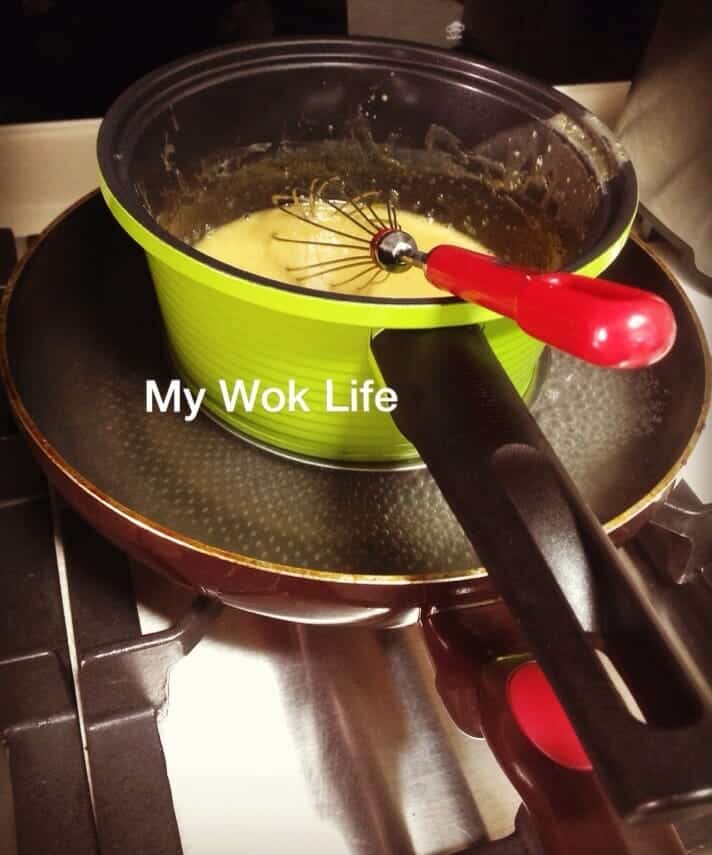
 And, if you wonder why the Kaya jam in your previous cooking turned lumpy, or why were you taking much longer time (more than an hour) to thicken the Kaya? My trick is to use “double boiling” method, with the bottom of the pot submerges in water. This way, your success rate of making quick lump-free Kaya jam would be almost 100%.
Yield 200g of Kaya Jam
Ingredients
5 small egg yolks (or 3 large yolks), room temperature
200ml of coconut milk
50g of Muscovado (Molasses sugar 黑糖)
25 – 30g of caster sugar
4-5 fresh Pandan leaves, tied into a knot and lightly crushed
Method
(1) Separate the egg yolks from whites (in a large bowl) carefully, with as clean yolk with minimal of white attached as possible. Whisk the yolks until well beaten.
(2) Fill water in a large frying pan (or sauce pan) with a steaming rack in it. Water should be more than half full or at least cover above (submerge) the steaming rack. Place a smaller (non-stick) pot on the rack and the bottom of the pot should be in the water as well. Heat up the water in the frying pan over high heat.
(3) When water is boiling, reduce heat to medium fire. Pour Muscovado sugar and coconut milk into the smaller pot. Gently dissolve with a small balloon whisk. Add Pandan leaves, let the coconut milk mixture simmer a little while, until you can feel the steam rises when placing your palm above the pot (simmering should not reach bubbling stage). Then, pour 1/3 of the mixture into beaten egg yolk, stir to combine at the same time. Return the yolk mixture to the remaining coconut milk mixture in the pot. Dissolve caster sugar in it.
(4) Now, simply simmer the watery Kaya mixture until it is thicken. Stir with the balloon whisk occasionally to smooth out the mixture. When the Kaya reaches your desired pasty consistency, heat off. Transfer to a dry container/ jar to let it cool completely.

Tips: Consistency test – lift some paste up with the whisk, it should be able to hold and fall immediately. If too watery, the paste will just flow down without able to hold onto the whisk once lifted. If too thick, paste will be just stick on the whisk or even lumpy. Not forgetting that the Kaya jam will set further (turn slightly thicker than when it’s just out of the stove) once cooled.
* With the right amount of ingredients, steps and cooking time, the Kaya paste shouldn’t be lumpy. I find that using hand (balloon) whisk to stir the cooking is useful. Hence, no blending or sieving is needed in my recipe to smooth the paste out.
* Take note that the pouring of hot coconut milk into beaten yolk has to be done with real quick stir to the yolk. Otherwise, yolk will be cooked. So, the simmering shall not take too long. Or, you may wait a little while.
* Coconut milk in packet is good enough for the recipe. It’s widely available in major supermarkets and grocery stores. No particular brand.
* Small eggs, I am referring to those eggs sold in a big tray (30 eggs in a tray) in supermarkets. That I called them small, while those premium ones sold in 10/packets are large sized.
* May add caster sugar up to 45g, if sweeter preferred, since it’s gonna spread on plain toast, usually.

Hi can use fresh coconut milk think is without preservatives and also more watery than the ones sold in supermarkets? Freah coconut milk I usually buy fr wet market!
Hi Michelle, that’s probably a great idea as freshly squeezed kind is usually more aromatic, but it means it would be more watery. Hence, not sure if the taste would be strong enough with little amount of the fresh watery kind, and also for sure, you have to simmer it for longer time in order to thicken it. If add big amount in order to increase flavor, it also means it will be really watery to be thickened, too.
I just checked the packets coconut milk I have at my pantry, it actually stated NO preservative. So, I guess it’s still good to be used, then.
I’ve tried your recipe, taste good! But I have a question , can I use all molasses sugar? So that the kaya will be dark brown? Or do you have any idea to make it darker? My hubby said the color is not dark enough, not like the kopitiam! Lol!
Yes, but it will not be as sweet I supposed. Increase the amount of Molasses sugar to make it sweeter as well as darker in colour, too. Alternatively, which is also my preference, is to use Gula Melaka aka Malacca Palm sugar. Not only it will be darker in colour but also more aromatic.
I just tried your recipe; it really was very authentic, lump free and didn’t take long at all! Making more tomorrow to give to friends. Thanks for sharing!
Glad you liked it!
It is my first time making own kaya & is a blessing to find your recipe. The kaya is a great success.
Thanks Veron. Indeed, it’s an easy and great recipe, I am proud to agree. :D
Hi
I used kara coconut cream instead of milk, is it okay? Thanks.
Yes, but it might affect the consistency of it’s much thicker in your coconut cream base.
Hi Patrica,
I’ve made very delicious kaya a few times since I saw your recipe here. The only thing that I want to improve, if you can help me, is the texture. It does not seem as ‘transparent’ and liquid as yours (in the photo:-)) or the type made with traditional method of stirring for hours.
Hence I dare not give it away as presents to my family members as they may find it odd. (LOL!!!)
About how long should I stir the kaya before taking it off the bain marie? I shortened it to 8 minutes but it was still quite ‘solid’. Maybe a mere 4 minutes is enough ?
Thank you for your advice in advance. Thank you again for sharing this lovely kaya recipe!
Can it be the black sugar you used is darker and denser? Or try to put abit more coconut milk? Shorten the stirring might cause the kaya to be more lumpy, so I would not advise so, but no harm trying though…
I am not sure how exactly you made the kaya at your end, thus, might not provide precise solution. Hope the above helps, still. :)
Hello Patrica, i was very excited to find your recipe. i was drawn to the photo of your kaya as i like this consistency. i grew up where kaya was made at home over a charcoal stove and it looked like yours; slightly “rough”.
My question is: you mentioned using either 5 small egg yolks or 3 large egg yolks. Could you translate that into ml or grams of egg yolks for me if possible? My egg size estimation is poor and i want to get it just right. Many thanks in advance.
Sue
Hi Sue,
Small egg should be about 35-38g. Hope this helps.
Kaya not thicken, where has gone wrong…?
Uses freah squeezed coconut milk, egg size A, honey rock sugar (refined), cooking time extended still not thicken but bottom developed lump.
Kindly engliten…. tq
Follow the recipe exactly and you should get there. :)